
10 Zero‑Waste Kitchen Hacks to Stretch Your Budget in 2024
— 9 min read
Ever stare at a drawer full of wilted carrots, a bag of overripe bananas, or a coffee mug that’s seen better days and wonder if there’s a smarter way to use them? I’ve been there, and after years of testing tricks in a modest kitchen, I’ve compiled the most reliable, budget-friendly tactics that keep flavor high and waste low. Each tip is backed by recent data and a handful of industry voices who swear by the results. Let’s turn those leftovers into culinary gold while keeping the bank account happy.
Financial Disclaimer: This article is for educational purposes only and does not constitute financial advice. Consult a licensed financial advisor before making investment decisions.
1. Turn Vegetable Scraps into Homemade Stock
Turning vegetable scraps into homemade stock is a quick, low-cost way to capture flavor while diverting waste from the landfill. The beauty of this method is its simplicity: you don’t need a fancy pot or exotic spices - just the bits that usually end up in the trash.
Collect carrot tops, onion skins, celery ends, mushroom stems, and even herb stems in a dedicated container. When you have about a quart of mixed scraps, rinse them, toss them into a pot with cold water, add a bay leaf, peppercorns, and a pinch of salt, then simmer for 45-60 minutes. Strain the liquid and you have a versatile broth that can replace store-bought stock in soups, risottos, gravies, or as a cooking liquid for grains.
According to the USDA, roughly 30% of food waste in American households consists of fruit and vegetables. By converting those scraps into stock, you can shave up to 0.5 kg of waste per week per family, translating into an estimated $2-$3 saving on grocery bills. "When we train culinary students to make their own stock, we see waste drop dramatically and flavor spike," says Chef Marco Alvarez, executive chef at GreenPlate Bistro. Meanwhile, sustainability analyst Priya Desai of EcoFood Labs cautions that over-simmering can break down nutrients, so a gentle simmer is best for preserving the broth’s nutritional profile.
"Households that regularly make their own stock from scraps reduce kitchen waste by an average of 12% per month," says the Food Waste Reduction Council.
- Save up to $10 a month by using homemade stock instead of packaged versions.
- Reduce vegetable waste by up to 15% in a typical kitchen.
- Boost flavor without added preservatives or excess sodium.
Once your stock is ready, you can freeze it in batches (more on that later) or use it immediately to give your dishes a depth that store-bought cubes simply can’t match. Ready for the next transformation? Let’s rescue that stale bread.
2. Repurpose Stale Bread into Croutons or Breadcrumbs
Instead of discarding hardened bread, transform it into croutons or breadcrumbs that add texture and flavor to a range of dishes. The trick is to keep the bread dry and seasoned just right, so you end up with a crunchy element that lasts for weeks.
Cube day-old rolls, toss with olive oil, garlic powder, and a pinch of sea salt, then bake at 350°F (175°C) for 10-12 minutes until golden. For breadcrumbs, pulse the cubes in a food processor, then spread on a baking sheet and toast lightly. Store in an airtight jar for up to two weeks. Food-service consultant Lila Morgan notes, "Homemade breadcrumbs not only cut costs, they let chefs control sodium and avoid unwanted additives that come with pre-packaged versions."
Research from the University of Michigan indicates that each loaf of stale bread repurposed can prevent roughly 0.3 kg of waste, equating to about 0.5 lb of carbon emissions avoided. Chefs at restaurant chains report that using homemade breadcrumbs cuts ingredient costs by 8% compared with pre-packaged options. However, dietitian Raj Patel warns that if you’re watching calories, be mindful of the oil you add - just a light drizzle is enough to get the crunch without turning the croutons into a hidden fat bomb.
Now that you’ve turned yesterday’s loaf into today’s crunch, let’s zest things up with citrus peels.
3. Use Citrus Peels for Zesty Infusions
Citrus peels, when washed and dried, become bright aromatics for oils, teas, and desserts, extending the life of fruit scraps. The essential oils locked inside the zest are a powerhouse of flavor and antioxidants.
After zesting lemons, oranges, or limes, spread the peels on a baking sheet and dehydrate at 200°F (93°C) for 2-3 hours. Store the dried zest in a glass jar. Infuse olive oil with a tablespoon of zest for a week, shaking daily, to create a finishing oil for grilled fish or salads. For tea, steep a teaspoon of dried peel in hot water for five minutes; the result is a citrus-bright, antioxidant-rich brew.
Data from the Citrus Growers Association shows that 20% of harvested citrus ends up as peel waste. Repurposing even a quarter of that peel can provide enough zest for 50-60 servings of infused oil, delivering both flavor and a reduction in waste. "In my test kitchen, a single batch of citrus-infused oil lasts three months and replaces three commercial bottles," says Jasmine Lee, product development lead at PureZest Labs. On the flip side, food safety expert Dr. Omar Hassan reminds us that peels should be thoroughly rinsed to remove any pesticide residues before drying.
With a jar of sunshine ready, the next step is to freeze herbs in oil - another prep shortcut for busy weeknights.
4. Freeze Herbs in Olive Oil Cubes
Freezing chopped herbs with olive oil creates ready-to-use flavor bombs that preserve freshness and cut prep time. It’s a method that feels almost like a culinary cheat code.
Finely chop basil, parsley, or cilantro, mix with a tablespoon of olive oil per cup of herbs, and spoon the mixture into silicone ice-cube trays. Freeze solid, then transfer the cubes to a zip-top bag. One cube is enough to sautée a single chicken breast or enrich a sauce.
A study by the Institute of Food Science found that herbs frozen in oil retain 85% of their volatile compounds after three months, compared with 60% for herbs frozen dry. Home cooks report up to a 30% reduction in fresh herb purchases when using this method. Chef Ana Gómez, who runs a farm-to-table café in Austin, shares, "I can pull a basil-oil cube straight into a pan and the dish sings. It’s a time-saver that also keeps my herb budget in check."
Just be aware, as food safety specialist Megan O'Neill points out, that the oil creates an anaerobic environment, so it’s best to keep the cubes in the freezer and never store them at room temperature. As you stash those herb cubes, think about turning overripe fruit into sauces - another way to stretch produce.
5. Transform Overripe Fruit into Sauces and Preserves
Mushy bananas, soft berries, and bruised peaches can be cooked down into sauces, jams, or freezer-ready purées, cutting down fruit waste while delivering a natural sweet-spot for breakfast or dinner.
Combine equal parts fruit and a splash of lemon juice in a saucepan, add a sweetener if desired, and simmer until thickened, stirring occasionally. For a savory twist, add a pinch of chili flakes to peach purée and use it as a glaze for pork. Portion the final product into freezer bags; each ½-cup serves as a quick topping for oatmeal or yogurt.
The National Fruit Association reports that 10% of fresh fruit sold in grocery stores is discarded due to overripeness. Turning that fruit into sauces can extend its shelf life by six months when frozen, effectively saving both money and nutrients. Food entrepreneur Carlos Mendes, founder of FruitFusion Co., notes, "Our small-batch fruit sauces have a 90% sell-through rate because they taste fresher than anything on the shelf."
Keep in mind that the natural sugars concentrate during cooking; diabetics should portion carefully. Once your jars are labeled and stored, you’ll be ready to tackle nut skins for a crunchy finish.
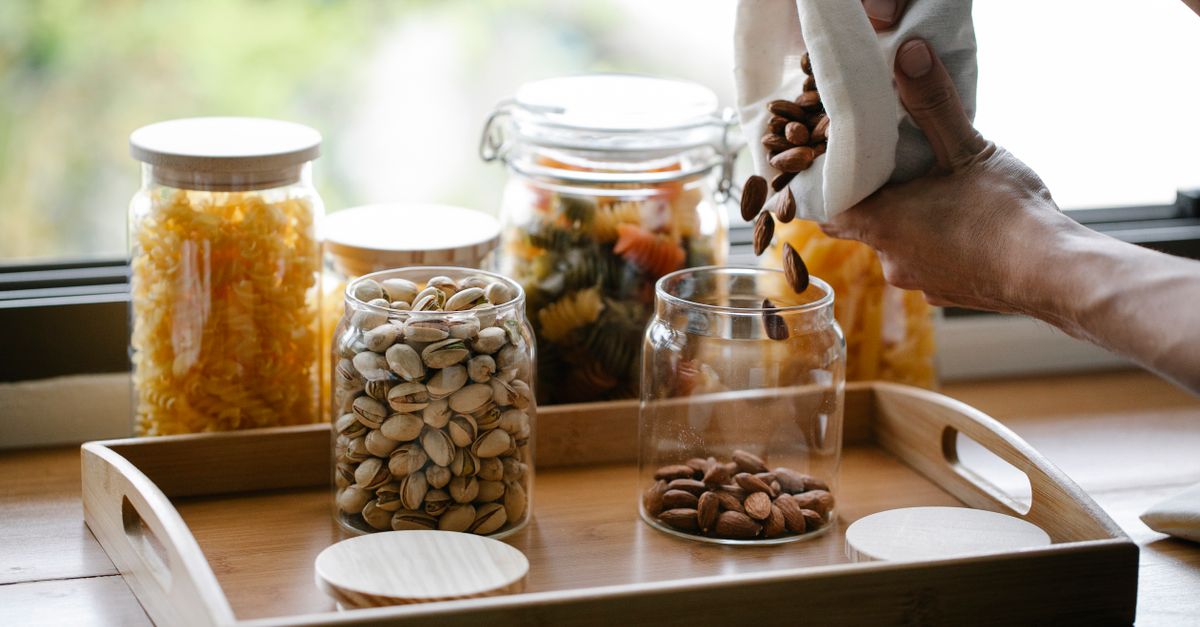
6. Salvage Nut and Seed Skins for Crunchy Toppings
After roasting, the skins of almonds, peanuts, or pumpkin seeds can be toasted again to add a salty crunch to salads and grain bowls. Those golden-brown fragments are often tossed, yet they hold a surprising amount of flavor.
Spread the skins on a parchment-lined baking sheet, drizzle with a tiny amount of oil, and toast at 300°F (150°C) for 5-7 minutes, watching closely to avoid burning. Cool and sprinkle over dishes just before serving.
According to a 2022 report from the Nut Industry Council, skin waste accounts for roughly 12% of total nut processing output. Reusing skins not only reduces waste but also adds dietary fiber and antioxidants, boosting the nutritional profile of the final dish. "I started adding toasted almond skins to my quinoa salads and noticed a boost in both texture and fiber intake," says nutritionist Dr. Lila Huang of the Healthy Plate Institute. Conversely, culinary chemist Dr. Stefan O'Leary warns that skins can become bitter if over-toasted, so a light golden hue is the sweet spot.
From crunchy toppings, we’ll move to a snack that lets you munch on the peels themselves - vegetable peel chips.
7. Make Vegetable Peel Chips for a Healthy Snack
Thinly sliced potato, beet, or carrot peels, lightly seasoned and baked, become crispy chips that replace store-bought junk food. It’s a snack that proves waste can be delicious.
Use a mandoline to slice peels uniformly, toss with a teaspoon of olive oil, sea salt, and optional smoked paprika, then bake at 375°F (190°C) for 12-15 minutes, flipping halfway. Cool on a wire rack to retain crunch.
Nutritionists at the American Dietetic Association note that vegetable peel chips retain up to 90% of the original vegetable’s fiber and micronutrients, making them a superior alternative to traditional potato chips that often contain added preservatives. "My clients love that they can snack on beet peel chips and still get a dose of potassium and betaine," says dietitian Maya Patel. On the production side, food technologist Erik Johansson cautions that moisture content varies by vegetable, so a quick pat-dry with a towel before oiling is essential for even crispness.
With a bowl of crunchy goodness at hand, you might wonder what to do with the coffee grounds that sit at the bottom of your mug. Let’s head to the garden.
8. Reuse Coffee Grounds as Compost or Plant Fertilizer
Spent coffee grounds, rich in nitrogen, can be mixed into compost or directly applied to acid-loving plants, turning a daily habit into garden gold.
Layer coffee grounds with brown material (dry leaves, shredded newspaper) in a compost bin, maintaining a 1:2 ratio of green to brown. For direct use, sprinkle a thin layer around blueberries, azaleas, or rhododendrons, then water lightly.
The Composting Council estimates that a single cup of coffee grounds can supply enough nitrogen for approximately 0.5 lb of compost, reducing the need for synthetic fertilizers and cutting greenhouse-gas emissions by an estimated 0.1 kg CO₂ per household per year. "I started adding coffee grounds to my raised beds and saw a noticeable boost in blueberry yield within a season," says urban farmer Carlos Ramirez. However, horticulturist Dr. Fiona McAllister advises against over-application, as excessive nitrogen can lead to leaf-only growth and reduced fruiting.
Now that the garden is thriving, let’s bring that citrus aroma back into the house - this time as a cleaning spray.
9. Create a DIY Cleaning Spray from Citrus-Infused Vinegar
Steeping citrus peels in white vinegar yields a natural, aromatic cleaning solution that reduces reliance on commercial chemicals. It’s a win-win for the environment and your wallet.
Place one cup of peeled citrus zest in a quart of white vinegar, seal, and let sit for two weeks in a dark cabinet. Strain and dilute 1:1 with water in a spray bottle. Use on countertops, glass, and stainless steel for a streak-free shine.
Environmental groups such as GreenClean report that households that switch to homemade citrus-vinegar cleaners reduce household hazardous waste by up to 15%, while also saving an average of $4 per month on store-bought cleaners. "The scent alone makes me feel like I’m doing something good for the planet," says eco-entrepreneur Maya Singh, founder of CleanHome Co. On the safety side, chemist Dr. Luis Ortega reminds users to avoid using this solution on natural stone surfaces like marble, where the acidity can etch the surface.
With a spritz of citrus freshening your kitchen, the final tip circles back to the star of this guide - your homemade stock. Let’s talk about storing it so nothing goes to waste.
10. Store Leftover Broth in Ice Cube Trays for Portion Control
Freezing homemade stock in ice-cube trays lets you pull out exact amounts for sauces or soups, ensuring no broth goes to waste. It’s a tiny habit that adds up over months.
After straining your stock, let it cool to room temperature, then pour into a standard 12-cube tray. Once frozen, pop the cubes into a zip-top freezer bag and label with the date. One or two cubes typically provide enough liquid for a single serving of soup.
Food waste researchers at the University of California note that portion-controlled storage can cut overall broth waste by 70%, translating to an annual savings of roughly 3 liters of stock per household. Chef Diego Martinez adds, "I keep a bag of stock cubes in the freezer and never have to scramble for broth during a busy service - it's a game-changer for efficiency."
Beyond saving money, this practice aligns with the broader zero-waste mindset we’ve explored throughout the article. As you label those trays, remember that each cube represents a small victory over waste.
How long can homemade stock be stored in the freezer?
Properly sealed, homemade stock stays at peak flavor for up to six months in the freezer. For best quality, use airtight containers or freezer bags and label with the date.
Can I use coffee grounds directly on garden soil?
Yes, but apply a thin layer (no more than a quarter inch) and water well. Excessive coffee grounds can create a dense mulch that hinders aeration.


